Share the post "How To Build A Soccer Rebounder (Rewarding Goals)"
When I was introduced to soccer, one of the first things that my dad bought me was a soccer rebounder. Our coach was adamant that all of the players practice on some form of rebounder after hours.
It could be a wall or one that your dad specially built. As long as you could pass, volley, and shoot against it, you were good to go.
- A soccer rebounder is a crucial piece of equipment when practicing your skills after hours and on the training pitch.
- The idea is to build a soccer rebounder similar to what your coaches use on the practice field, one that rebounds the ball back to you in various fashions.
- A soccer rebounder is easy to construct when you have suitable materials and tools.
- If you cannot build a rebounder, you can use a clear wall area to train your soccer skills.
Building a soccer rebounder is easy and fun to do as a dad-son project. You can expect to pay $300 and more for a decent, durable rebounder online.
That is a lot of money for something that you can build for under $100. In this article, I will guide you step-by-step in how to build your soccer rebounder.
How To Build A Soccer Rebounder
You have two choices when it comes to a soccer rebounder. Either you buy one, and a quality one is often costly, or you build one yourself
Building one is relatively easy, and you don’t have to be a DIY master at constructing one. First things first, you need suitable materials.
Materials Required To Build A Soccer Rebounder
Before any DIY project can start, you need suitable materials for the job. Some soccer rebounders are fitted with net material attached to a frame.
We will focus on building a solid wood one instead, as it is much easier and cheaper to build.
Visit your nearest hardware store and buy the following:
- Two plywood sheets that measure 2x4ft, these boards should already be cut to size, costing around $18 per sheet.
- Four corner braces (6” x 1-1/8″), at plus-minus $4 per piece.
- Twenty-four bolts (Either 5/16’’ x 2’’, or 5/16 x 1-½’’) and a packet of 5/16’’ nuts, which should total $11 or so.
- Utility pull handle (6 ½’’) that should not cost more than $8.
- Three paint and primer (all in one) spray cans (do not have to be the most expensive paint on the market), look for paints that cost as little as $5 per spray can.
- Sandpaper sponge ($5), should you not have a sanding machine at home, if you do, get sanding discs instead that fit your machine.
- The materials you buy should not total more than $100, as this would indicate that you are overspending.
Step-By-Step Guide: Building A Soccer Rebounder
We are ready to jump straight into the step-by-step guide on how to build a soccer rebounder. Additional items that you will need before we start building is:
Step 1 – Cutting
Please take one of the plywood boards and cut it in half (from top corner to opposite bottom corner), leaving you with two semi-triangle boards.
Use the straight edge ruler and a sharpie to mark the line before cutting it with your circular saw.
Take the two triangles and cut off 21’’ from the smallest corner of each board. These two boards will form the bag support/legs of the rebounder. Shortening it will make it easier to move around.
Step 2 – Frame
Place the uncut 2×4 plywood board on a workbench and lay it flat. Measure a distance of 1 foot from each side and mark the spot.
These markings are where you will attach the two cut-out pieces of plywood that will form the back support.
Step 3 – Braces
Place one of the cut-out back legs on the line that you have marked previously. Take two corner braces and mark an area of approximately 6” from the bottom and the top of the board.
Place the corner braces on this spot and up against the leg. Mark the holes with the sharpie.
You should mark three holes on the flat board and three holes on the support board. Repeat this step with all the other corner braces.
Step 4 – Drilling
Take your power drill and drill through all the markings on all of the boards. Attach the corner braces to the boards by inserting the bolts, and tighten all the nuts accordingly.
Step 5 – Fixing
After attaching all the boards, it’s time to fit the handle. Position the handle in a place somewhere on the topside of the wood (at the back of the rebounder) that will allow for a comfortable carry.
Screw the screws in tightly.
Step 6 – Smoothing
The soccer rebounder should now be complete in its construction. Use your sanding machine or sanding sponge, and make sure to sand the corners of the rebounder.
Smoothing the corners will protect your hands from splinters when using them.
Step 7 – Paint
Every rebounder deserves to look professional. Please give it some finishing touches by spray painting it.
Two coats of paint, then you can proceed to try and kick it off.
Step 8 – Testing
Your soccer rebounder is now ready to go onto the practice field.
The above design was the simplest one, as well as being durable and stable.
Soccer Drills You Can Practice Using A Soccer Rebounder
A soccer rebounder should form part of any soccer player’s training equipment. The rebounder allows a player to practice soccer drills, ultimately enhancing a player’s game, and skills like:
- One-Touch Passes
- Ball Control (Both Feet)
- Striking
- Turning
- Dribbling
- Shooting
- Volleys
- Air Control
- Headers
Soccer Rebounders Online
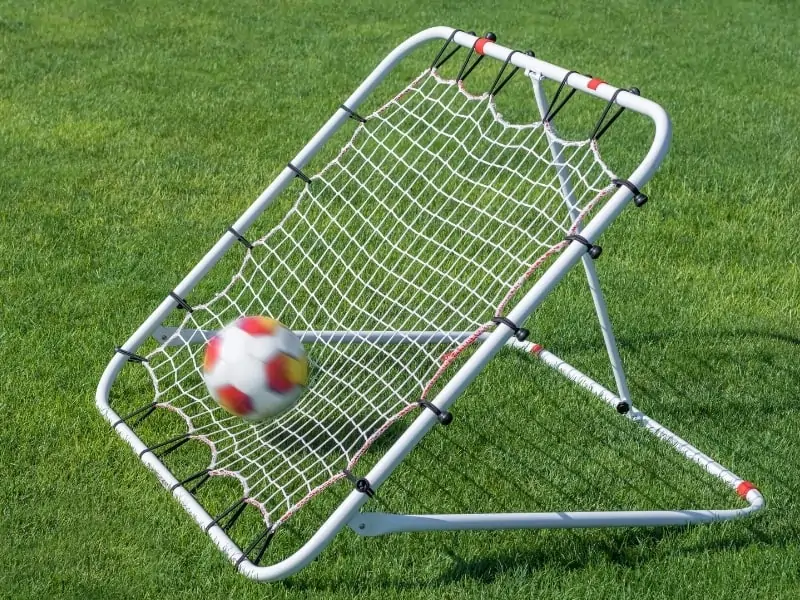
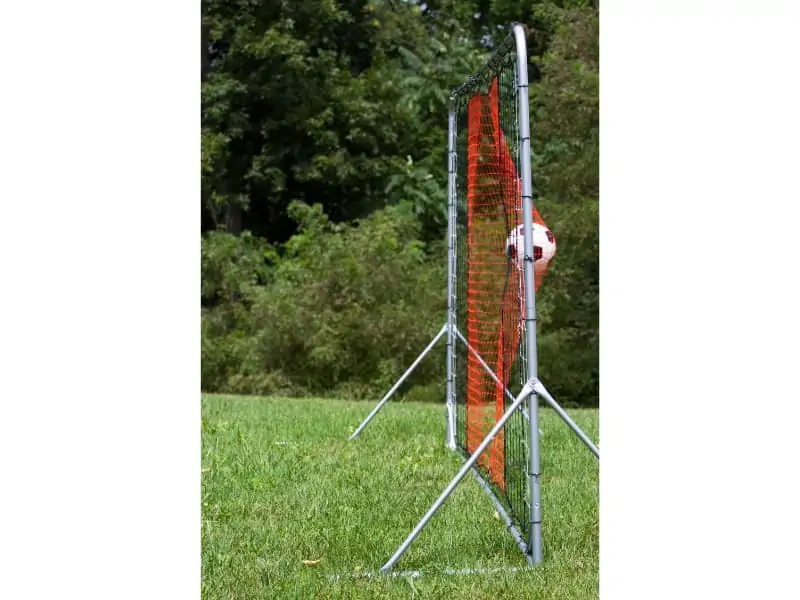
If you are not a DIY person and don’t mind spending a few dollars, do yourself a favor, and look at the following rebounders that I found online:
- SKLZ-Adjustable Rebounder
- Alpha Gear FC Soccer Foldable Rebounder
- Forza Soccer Rebound Wall
- RapidFire Soccer Rebound Board
- PodiuMax Upgraded Portable Soccer Trainer
It does not matter if you build or buy a soccer rebounder. You can even use a wall as a makeshift. Using a soccer rebounder is essential to fine-tune different parts of your game.
Professional players use it as part of their training regime to keep their skill levels at an optimum level.
I leave you with this quote from one of my heroes, a skilled master of the game, Dennis Bergkamp,
“Most of the time I was by myself, just kicking the ball against a wall, seeing how it bounces, how it comes back, just controlling it. I found that so interesting!”
Dennis Bergkamp
References:
- How to Build A Soccer Rebounder? – The Love of Key 699 (wordpress.com)
- The Best Soccer Rebounder to Buy in 2021 (and How to Use It) (soccercoachingpro.com)
- Plans | Kick Walls
Share the post "How To Build A Soccer Rebounder (Rewarding Goals)"
Joel is a seasoned soccer journalist and analyst with many years of experience in the field. Joel specializes in game analysis, player profiles, transfer news, and has a keen eye for the tactical nuances of the game. He played at various levels in the game and coached teams - he is happy to share his insight with you.